Software development has become increasingly complex, demanding higher levels of code quality and speed to market. Engineering leaders face the challenge of building robust, scalable applications while adhering to tight deadlines. To address these challenges, teams must prioritize code reliability and maintainability.
Linters are essential tools for achieving these goals. By automatically analyzing code for potential issues, linters help developers catch errors early in the development cycle, preventing costly mistakes and reducing technical debt. Not only do linters improve code quality, but they also streamline the development process.
Let's get into how linters work and the concrete benefits they bring to your engineering organization.
Understanding Linters
Linters are static code analysis tools that inspect code without running it. They meticulously examine code for errors, inconsistencies, and style violations. Unlike traditional testing, which often uncovers issues late in the development process, linters offer real-time feedback, enabling developers to address problems proactively.
By identifying issues early, linters promote a more consistent and predictable codebase. This enhances code readability, maintainability, and reliability by reducing runtime errors.
In the next section, we’ll explore how you can implement linters into your development workflow.
How to Implement Linters in Your Workflow?
Integrating linters into your development workflow is a straightforward yet impactful way to maintain code quality. Let's discuss how to set up and use linters effectively in different environments.
Setting Up Linters in Development Environments
1. IDE and Text Editor Integrations
Most modern integrated development environments (IDEs) and text editors support linters through plugins or built-in features. For instance, Visual Studio Code, IntelliJ IDEA, and Sublime Text have extensive support for various linters, making it easy to integrate them into your daily workflow.
Steps to Integrate Linters:
- Choose the Appropriate Linter: Select a linter that matches your programming language and project needs. For JavaScript, ESLint is a popular choice, while Pylint is suitable for Python.
- Install the Linter: Install the linter via your IDE's plugin marketplace or using a package manager like npm for ESLint, pip for Pylint, or gem for RuboCop.
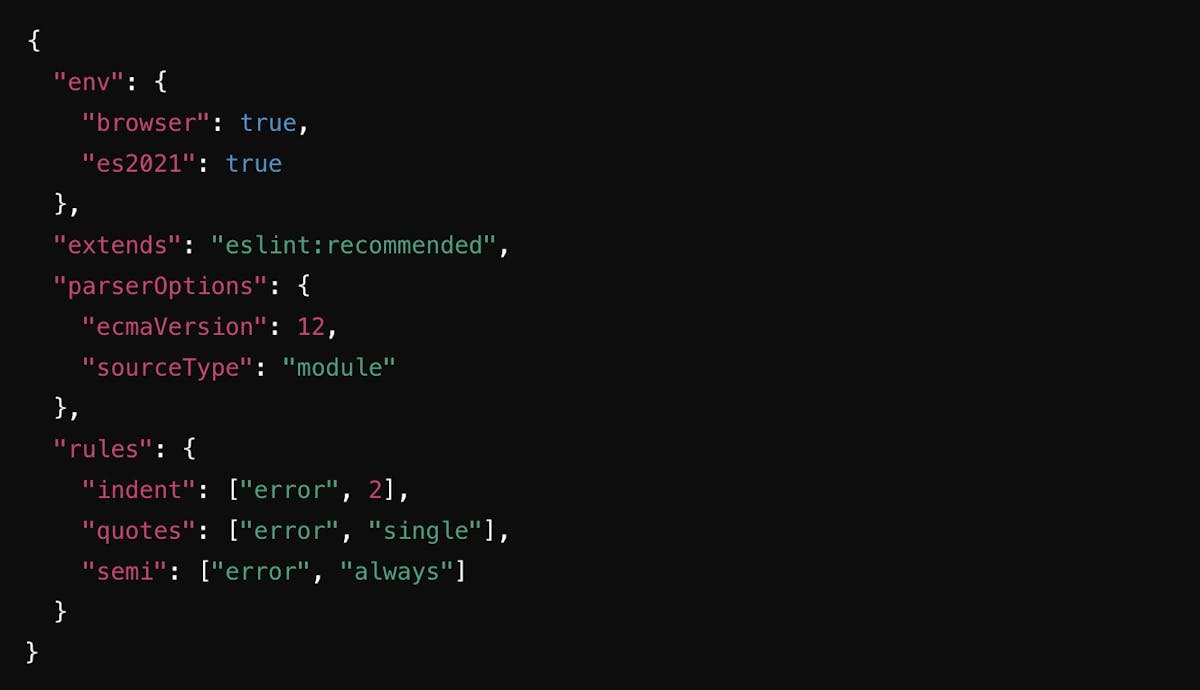
- Configure the Linter: To define your coding standards and rules, set up a configuration file (e.g., .eslintrc.json for ESLint, .pylintrc for Pylint).
- Enable Real-time Feedback: Ensure your IDE or text editor is configured to provide real-time linting feedback as you code.
Configuration and Customization
Customizing linters to fit your team's coding standards is crucial for maximizing their effectiveness. Configuration files allow you to specify rules for code style, complexity, and potential error patterns.
Example: ESLint Configuration:


