Multiple identities per user
In Hatica, admins have the flexibility to add multiple identities for the same applications such as GitHub, Slack, and others. This feature facilitates efficient management across various roles or projects within these platforms, enhancing flexibility and productivity in digital interactions.
Steps to Add Identities:
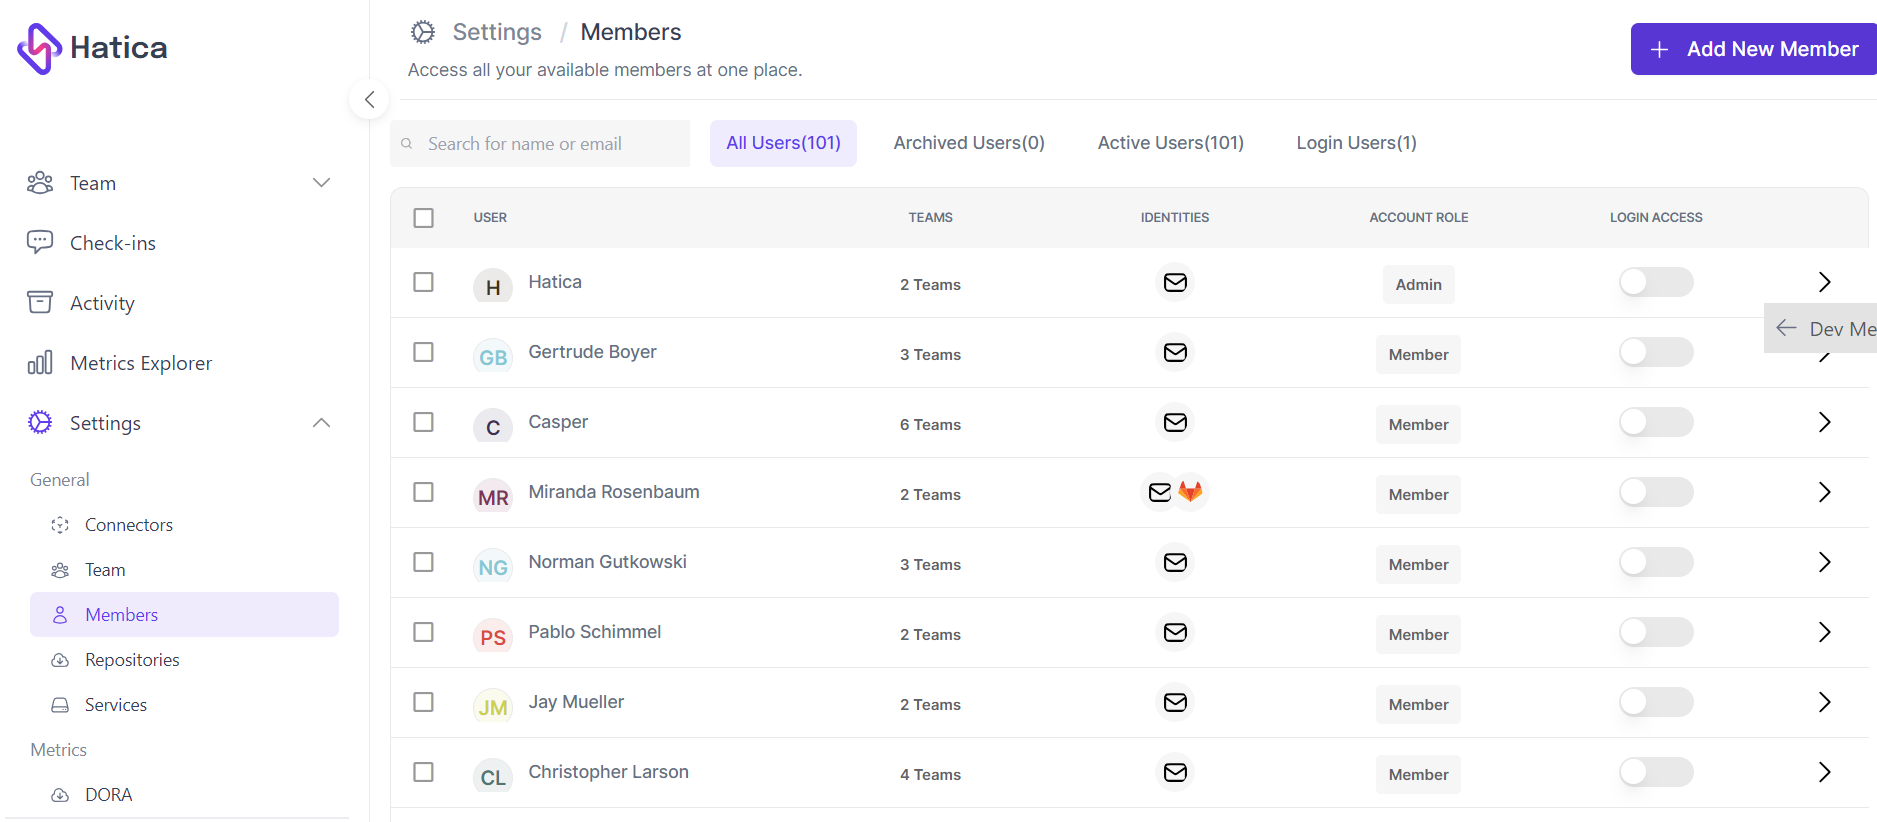
- Access User Settings:
-
Navigate to Settings and select Members.
-
Click on the user whose data you wish to edit.
-
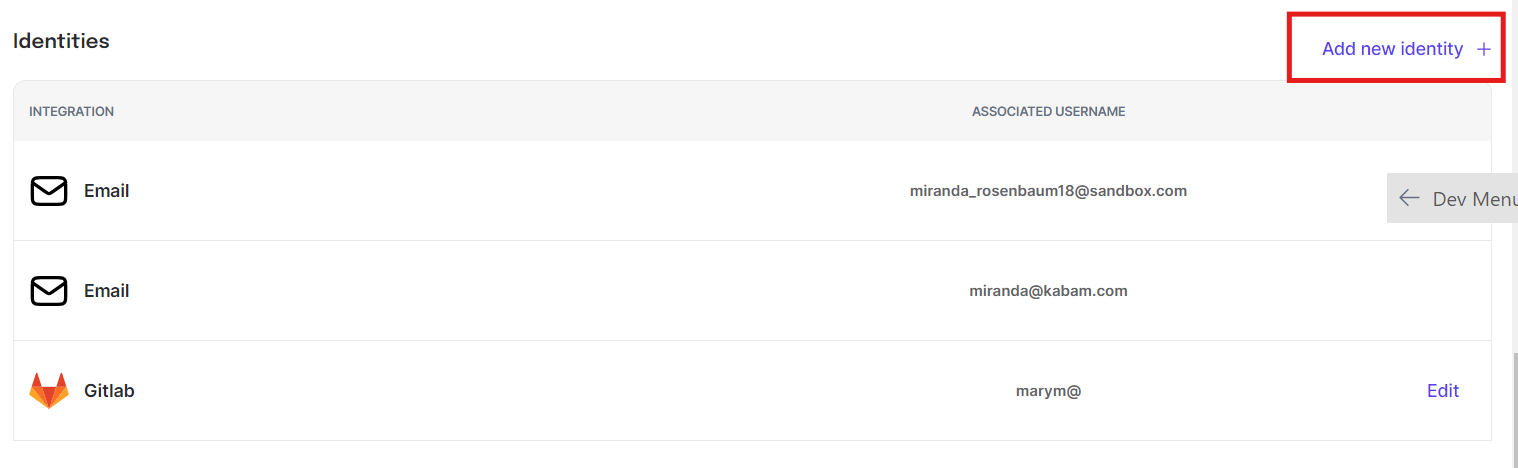
- Edit Identities:
- Scroll down to the Identities table to make modifications.
- Add New Identity:
-
Click on the "Add new identity +" button to invoke a popup.
-
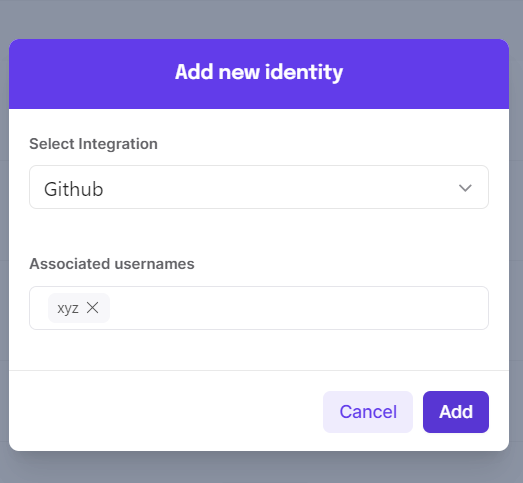
- Enter App ID:
-
Select the integration from the dropdown and enter the ID associated with the connected app.
-
Click Save to confirm the changes.
-
Login access on/off
Managing login access on Hatica ensures secure user authentication and controlled platform usage. Administrators can navigate to the Settings section, select Members, and toggle login access for individual users, enhancing data protection and platform security.
Steps:
- Go to Settings and Access Members:
- Go to Hatica platform settings, click on "Members"
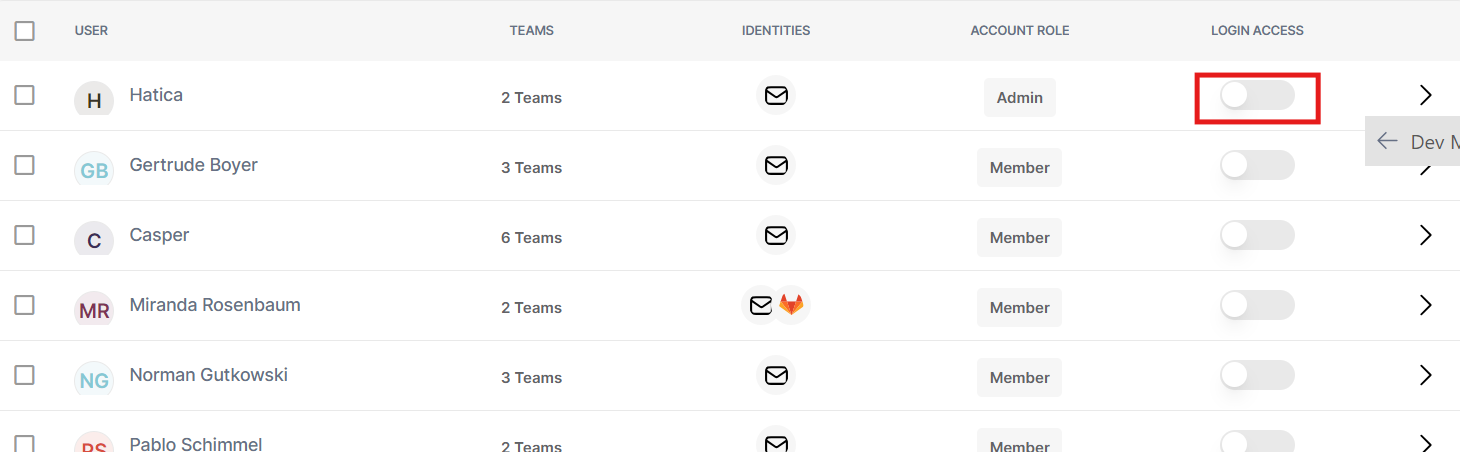
- Find the Login Access Column:
- Once you're in the Members section, you'll see a table or list displaying user information, including their permissions and settings.
- Look for the column labeled "Login Access". This column typically controls whether users have the ability to log in to the platform.
- Toggle the Button to Provide Access:
- In the Login Access column, locate the user for whom you want to manage login access.
- Next to the user's name, you'll see a toggle button or switch.
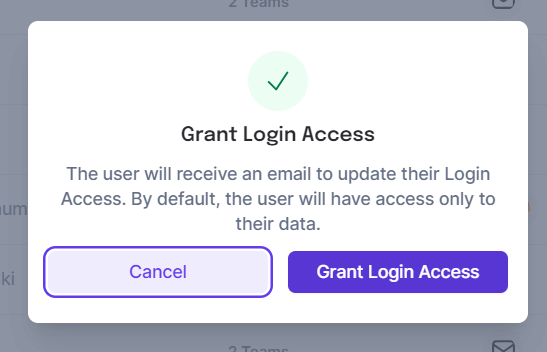
- To grant login access, simply toggle the button to the "On" or "Enabled" position. This will provide the user with the ability to log in to the system.
- To revoke login access, toggle the button to the "Off" or "Disabled" position.
- Confirm the Action:
- Upon toggling the button to provide or remove login access, a pop-up window or confirmation dialog may appear.
- The pop-up will typically ask you to confirm your action, either to grant or remove login access for the selected user.
Attaching additional email identities
1.Access User Settings:
- Navigate to Settings and select Members.
- Click on the user whose data you wish to edit.
-
Edit Identities:
- Scroll down to the Identities table to make modifications.
-
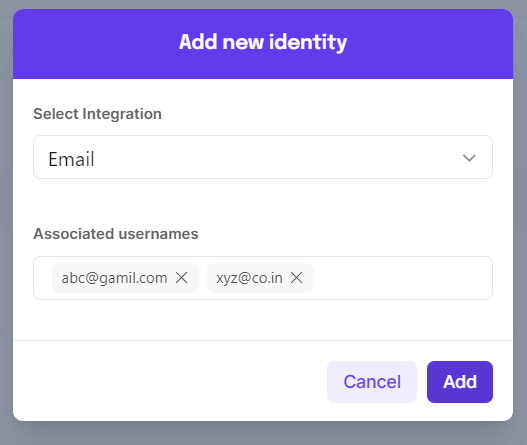
Add New Identity:
- Click on the "Add new identity +" button to invoke a popup.
-
Enter App ID:
-
Select the Email integration from the dropdown and enter the ID associated with the connected app.
-
Click Save to confirm the changes.
-
Archiving/unarchiving users
Steps to Archive Users:
Archiving users is a process of deactivating their accounts while preserving their data within the system. This feature is typically used when a user no longer requires access to the platform but their data needs to be retained for historical or compliance purposes. By archiving users, organizations can maintain data integrity while managing user access efficiently.
- Go to Settings and Access Members:
- Go to Hatica platform settings, click on "Members"
- Select Users to Archive:
- Within the Members section, you'll see a list of all users associated within the organization.
- Browse through the list and select the users that you want to archive. You can do this by clicking on the checkboxes next to their names.
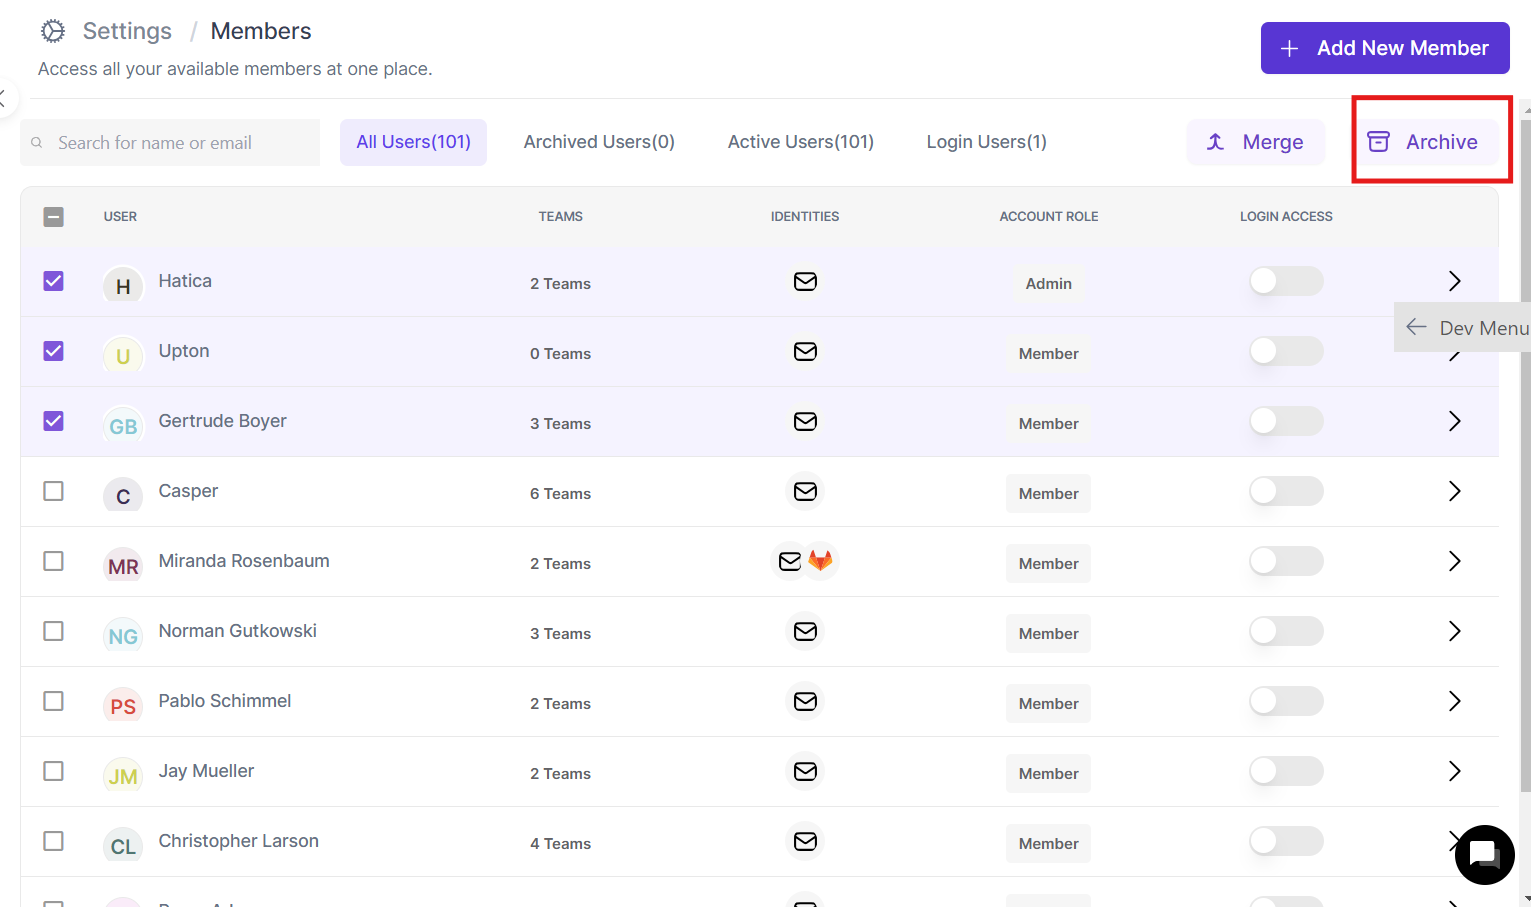
- Access Archive Option:
- After selecting the desired users, locate the "Archive" button. This button is usually located at the top right corner of the page.
- Click on the "Archive" button to initiate the archiving process.
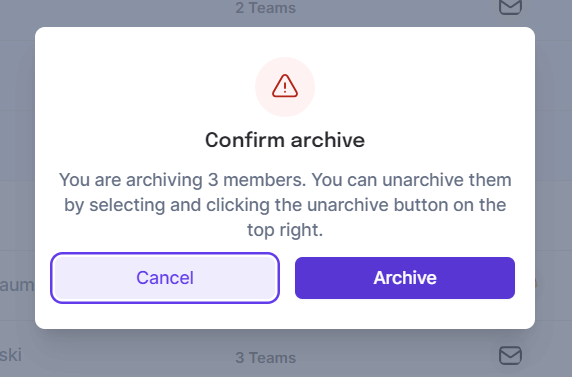
- Confirm Archiving:
- A pop-up may appear, asking you to confirm your action.
- Review the list of users selected for archiving and ensure that you have chosen the correct ones.
- If everything looks accurate, proceed by clicking on the "Archive" or "Confirm" button.
- Save Changes:
- After confirming the archiving action, the selected users will now be archived, meaning their accounts will be deactivated or hidden from the active user list and will be displayed in Archived Users tab.
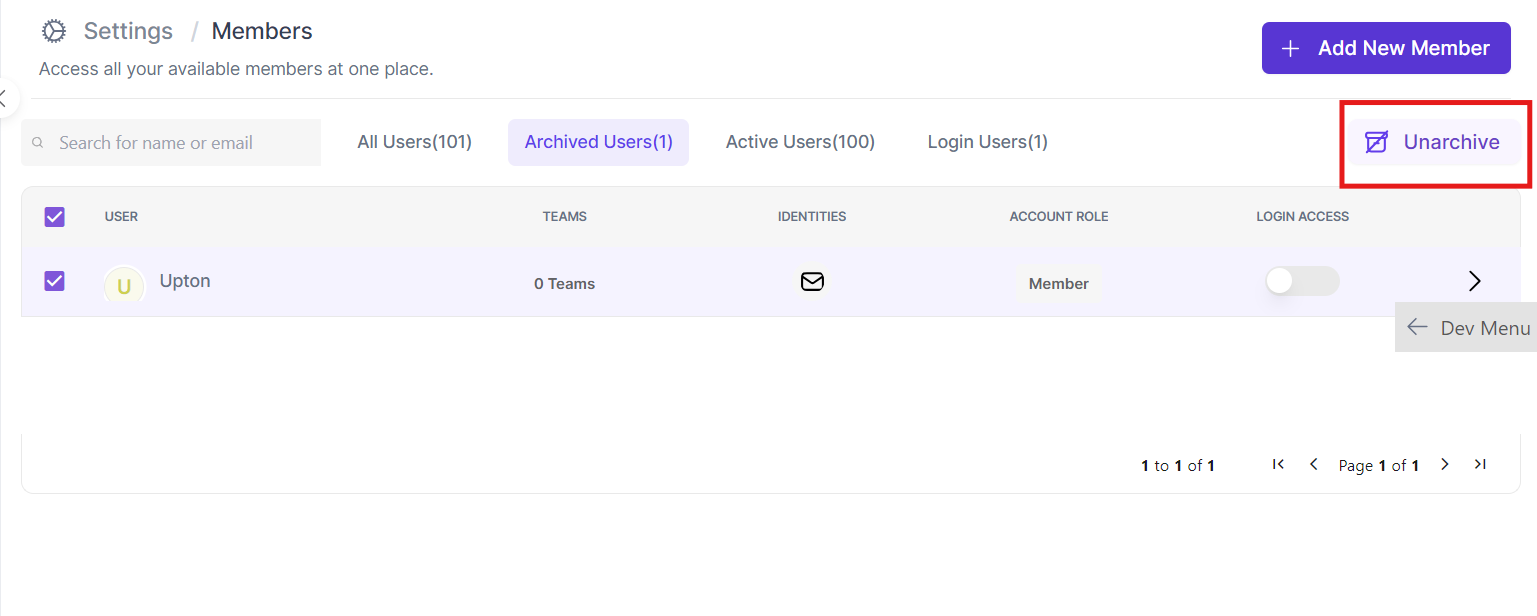
Steps to Unarchive Users:
Unarchiving users involves reactivating their accounts after they have been archived. This process restores user access to the platform while retaining their previous data and settings. Unarchiving users is useful when a previously archived user needs to regain access to the platform, such as when returning to work after a leave of absence or resolving account-related issues.
-
Go to Settings and Access Members:
- Go to Hatica platform settings, click on "Members"
-
Access Archived Users Section:
- Within the Members section, you'll see a list of all users associated within organization.
- Look for a tab labeled "Archived Users" . Click on this option to view the list of archived users.
-
Select Users to Unarchive:
-
In the Archived Users section, browse through the list and select the users that you want to unarchive. You can do this by clicking on the checkboxes next to their names.

-
-
Access Unarchive Option:
- After selecting the desired users to unarchive, locate the "Unarchive" button. This button is usually located at the top right corner of the page.
- Click on the "Unarchive" button to initiate the unarchiving process.
-
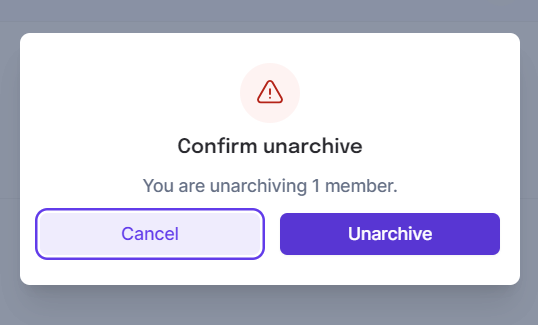
Confirm Unarchiving:
- A pop-up may appear, asking you to confirm your action.
- Review the list of users selected for unarchiving and ensure that you have chosen the correct ones.
- If everything looks accurate, proceed by clicking on the "Unarchive" button.
-
Save Changes:
- After confirming the unarchiving action, the selected users will now be unarchived, meaning their accounts will be activated or restored to the active user list.
Merging users
Merging members is the process of consolidating user accounts within the system. This feature is used to eliminate duplicate accounts or combine multiple accounts for streamlined access. During merging, information from multiple accounts is merged into a single unified account, ensuring data integrity and simplifying user management. By utilizing merging functionality, organizations can efficiently manage user accounts and improve overall system usability.
-
Navigate to Members in the Settings Section:
- Go to Hatica platform settings, click on "Members"
-
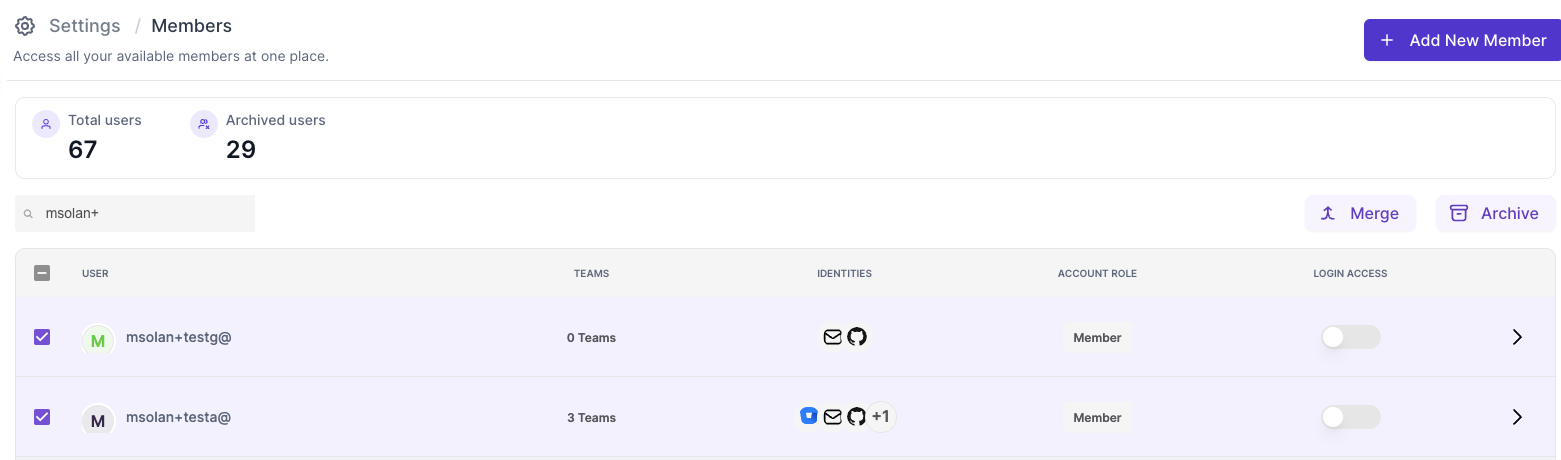
Select Members to Merge:
- In the Members section, you'll see a list of members associated with the account or application.
- Click the checkbox next to each member you want to merge. Ensure that you select more than one member to merge.
-
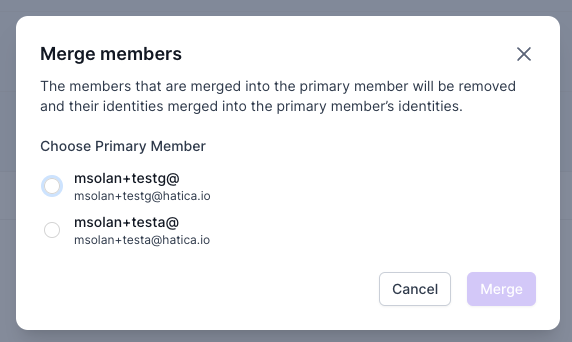
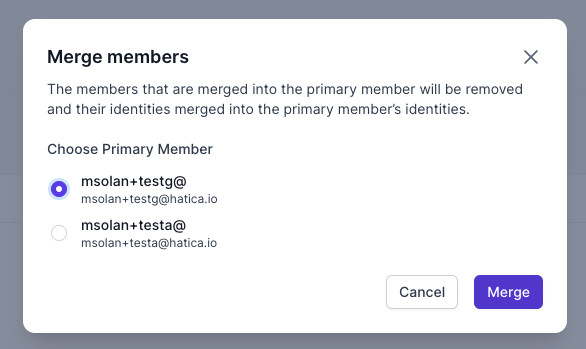
Open the Merge Member Modal:
- After selecting the members, locate and click on the "Merge" button. This action will open the merge member modal.
- Upon opening the modal, you will see the list of members you have selected for merging. Review this list to ensure you have selected the correct members.
-
Choose Primary Member:
- In the merge member modal, you need to designate one member as the primary member. This member will retain their identity and any associated data.
- Click on the member whom you want to make the primary member. This member will have their identities preserved, while the identities of other selected members will be transferred to them.
-
Confirm and Merge:
-
Once you've chosen the primary member and reviewed your selections, click on the "Merge" button to confirm the merge operation.
-
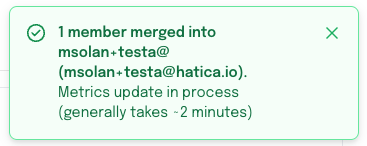
Upon merging, all the identities and associated data of the secondary members (those not selected as the primary member) will be transferred to the primary member.
-
Once merged, a success notification will pop up on the top right, and all the identities from secondary members will be transferred to primary member.
-
email ID is mandatory for user to be created
When adding a new user to the system, the email ID serves as the primary key or unique identifier. This requirement ensures that each user's account is distinct and properly associated with their email address. Email IDs are essential for effective communication, account verification, and notification delivery within the platform. By requiring an email ID during user creation, the system maintains data integrity, enhances security, and facilitates seamless collaboration among team members.
Steps to Add Members:
-
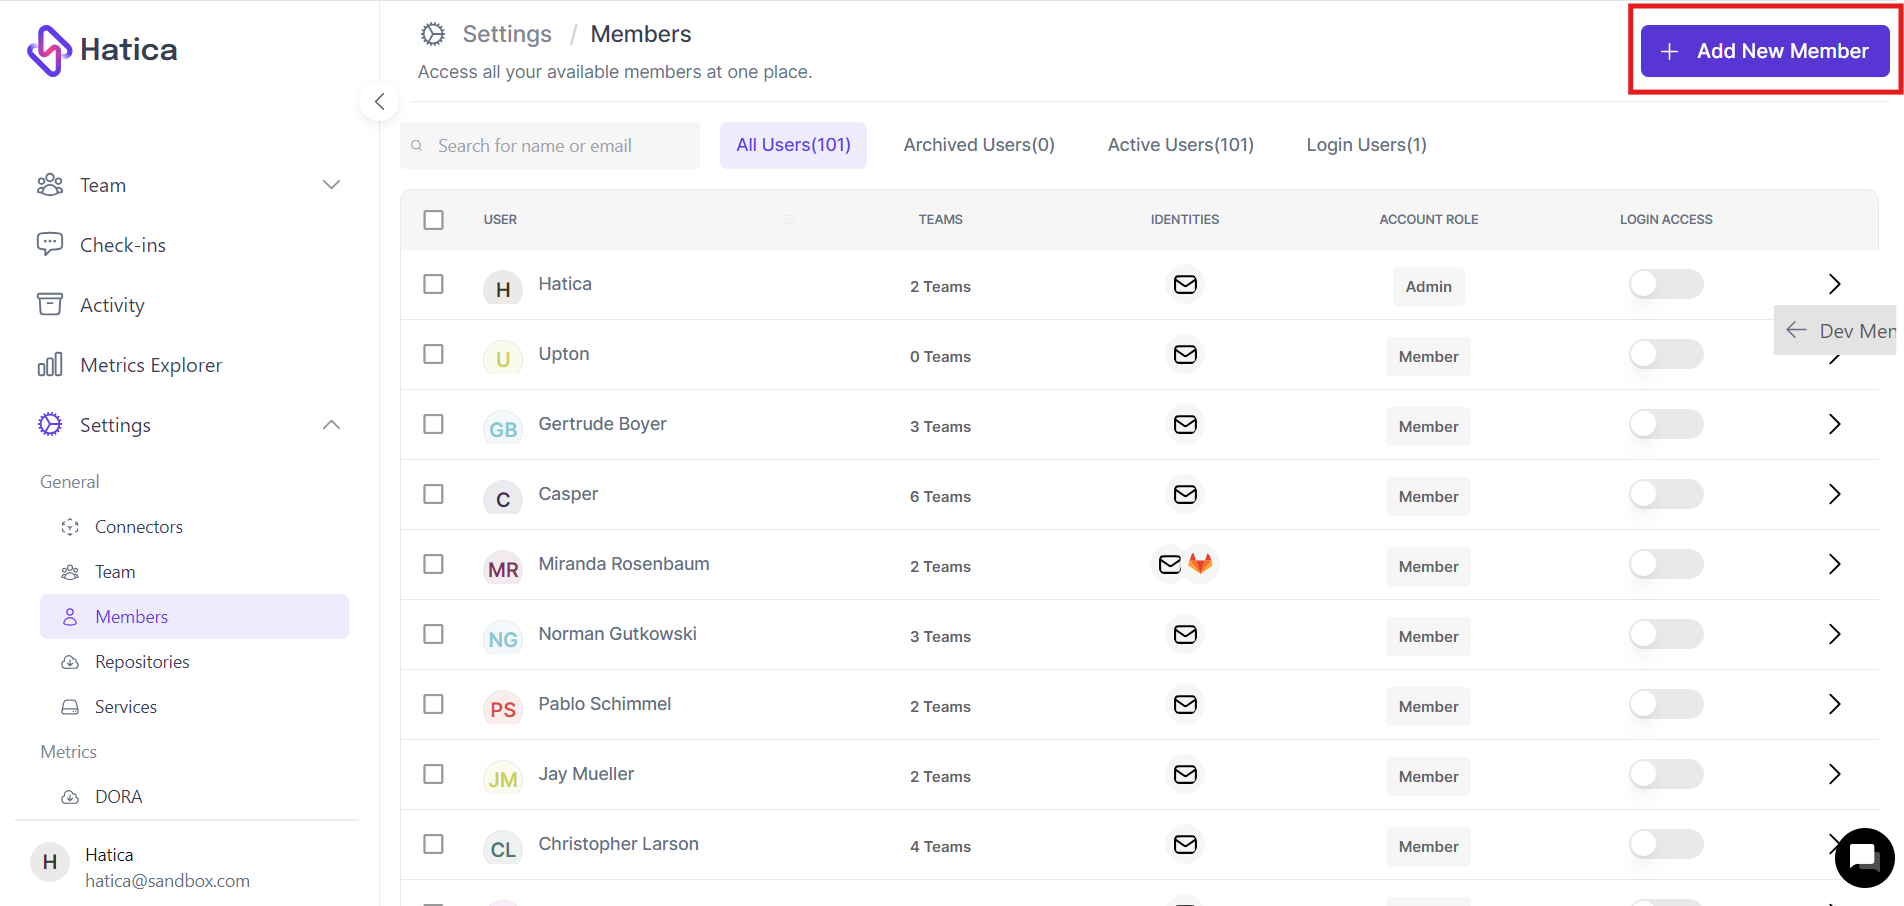
Go to Settings and Access Members:
- Go to Hatica platform settings, click on "Members"
-
Click on "Add New Member":
- Within the Members section, locate and click on the "Add New Member" button.
- Within the Members section, locate and click on the "Add New Member" button.
-
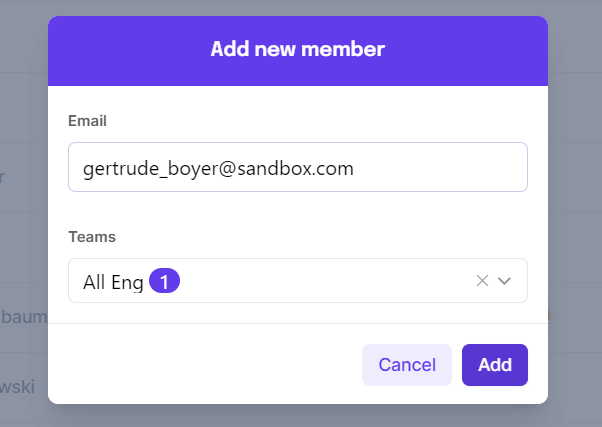
Enter Member Details in the Pop-up:
- After clicking on "Add New Member," a pop-up window will appear.
- In the pop-up, enter the email address of the new member in the designated field.
- Select the team to which the user belongs from the dropdown menu or list provided.
-
Click on "Add":
- Once you've entered the email address and selected the team, click on the "Add" button.
-
Redirect to Member Details Page:
- After clicking "Add," the new member will be created, and you will be redirected to a page displaying the details of the newly added member.
- On this page, you have the option to perform additional actions, such as:
-
Adding the member to more teams.
-
Assigning a manager to the member.
-
Adding new or multiple identities to the member.
-
Editing their access control permissions.
-
Changing managers
Changing team managers in Hatica allows for seamless delegation of responsibilities and effective team leadership. By navigating to the Settings section and accessing the Members tab, administrators can easily update team managers, ensuring streamlined communication and efficient project management.
-
Go to Settings and Access Members
- Go to Hatica platform settings, click on "Members"
-
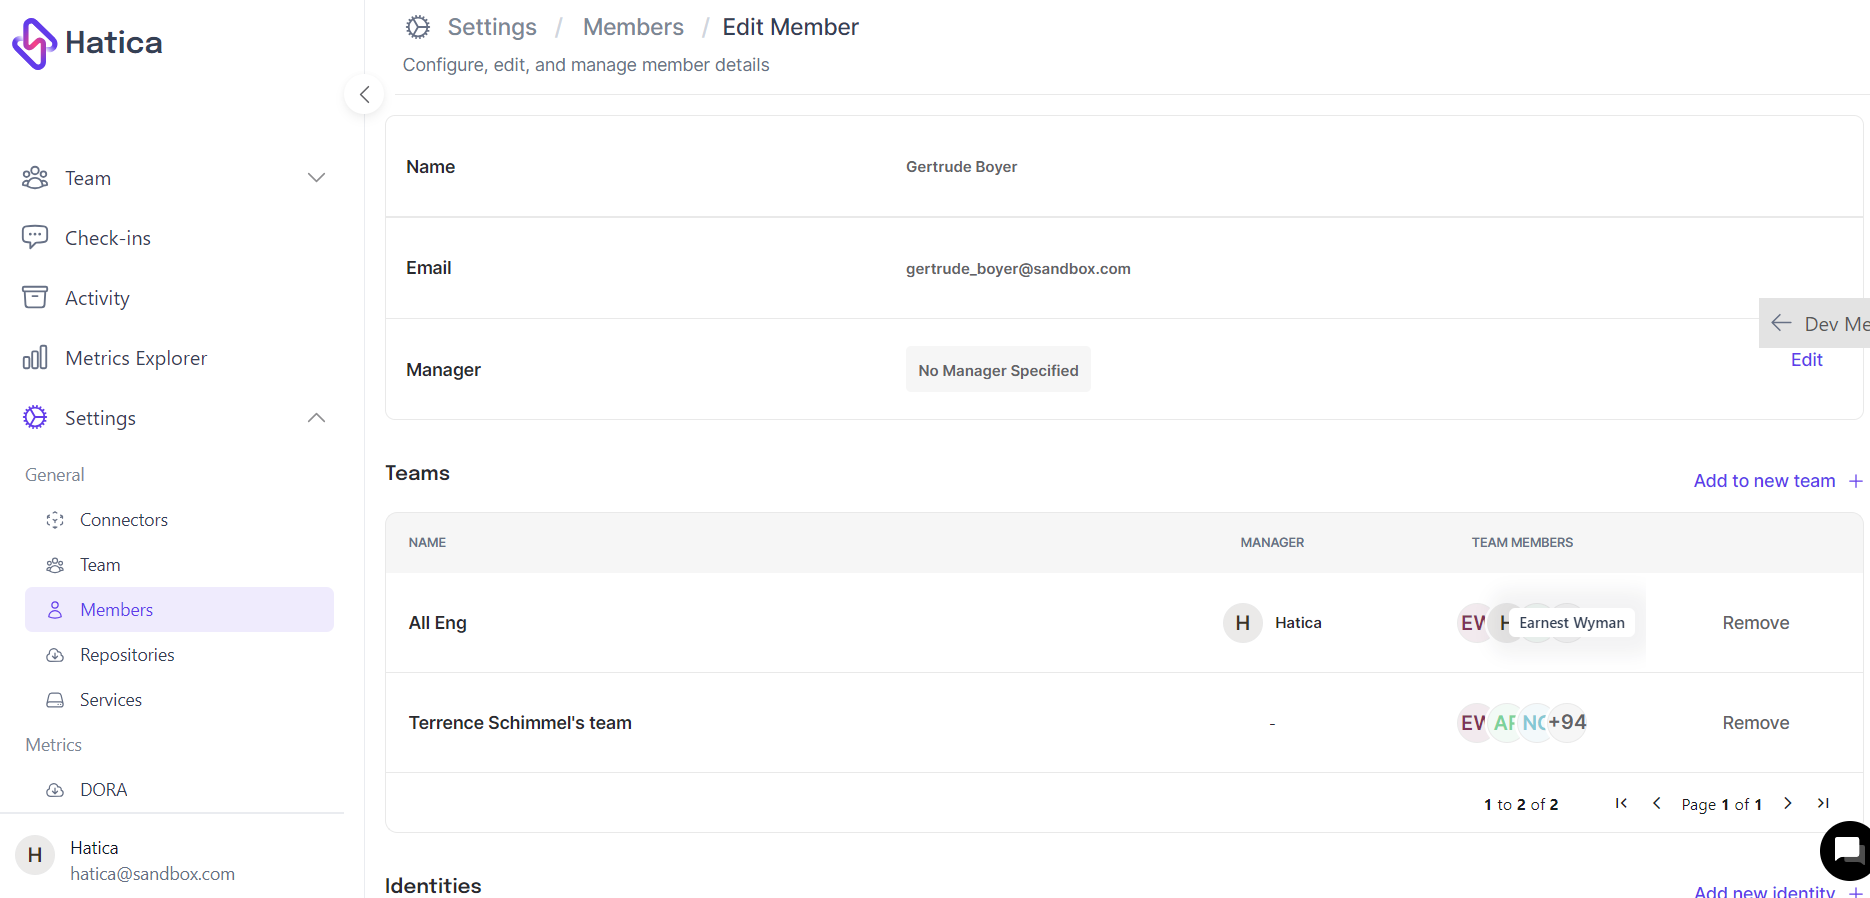
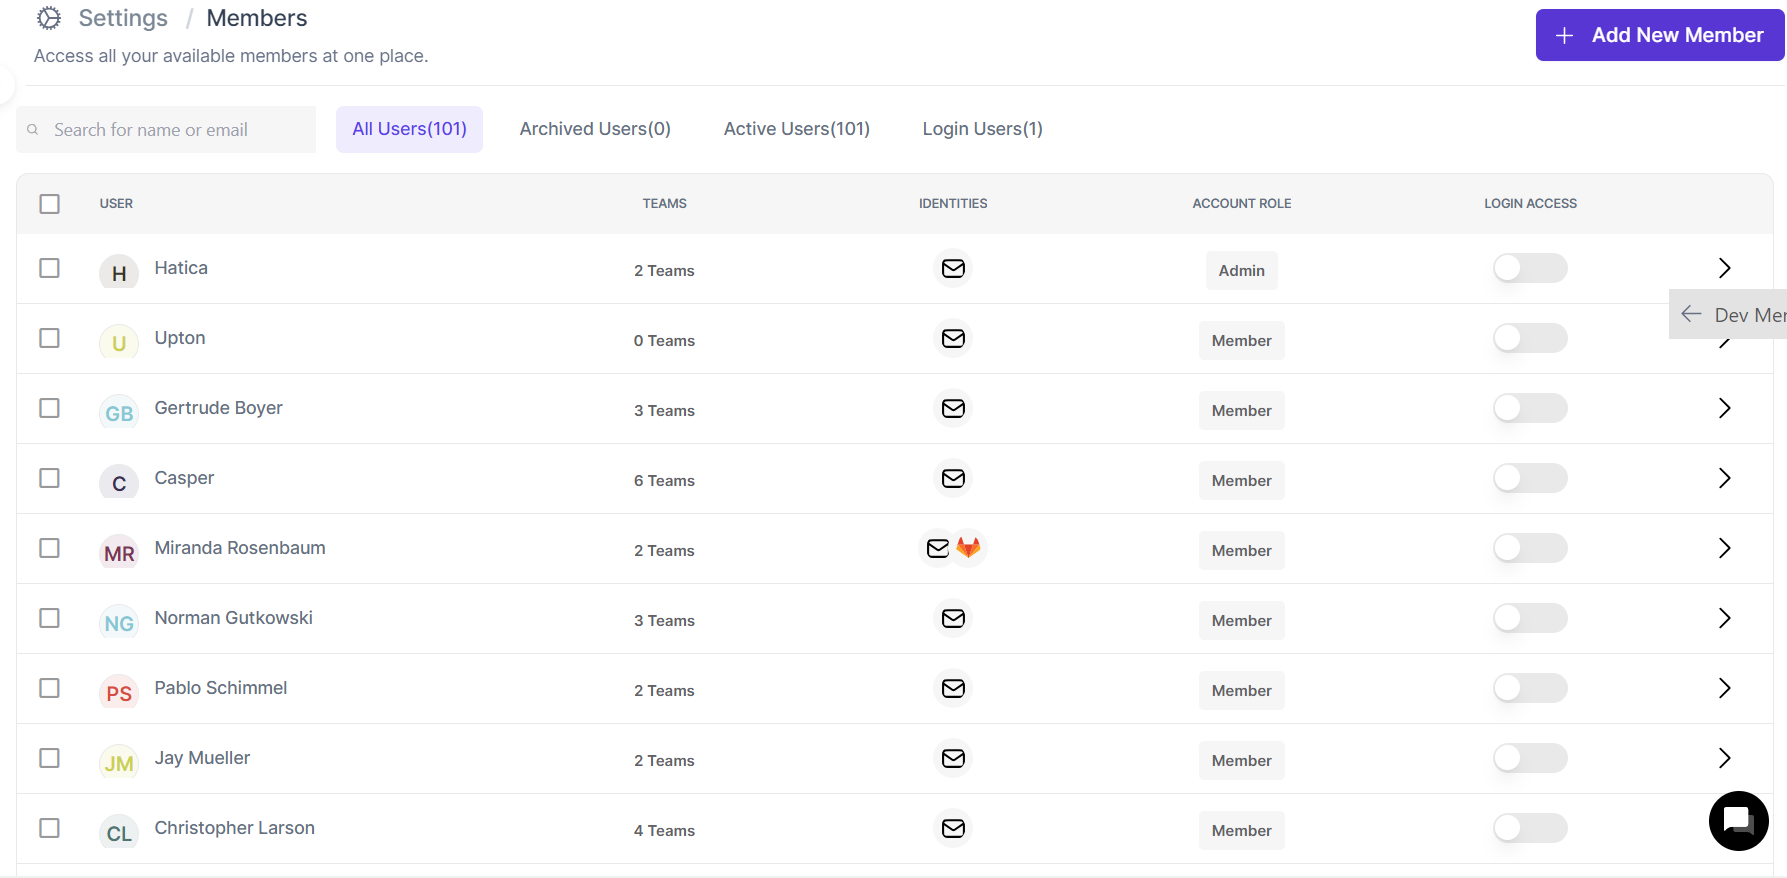
Select the User to Edit Manager Details:
- Once you're in the Members section, you'll see a list or table displaying user information, including their roles and settings.
- Identify the user for whom you want to change the manager details, and click on their name or profile to access their settings.
-
Navigate to Manager Section:
-
Within the user's settings page, locate the section labeled "Manager". This section typically displays information about the user's reporting structure and manager details.
-
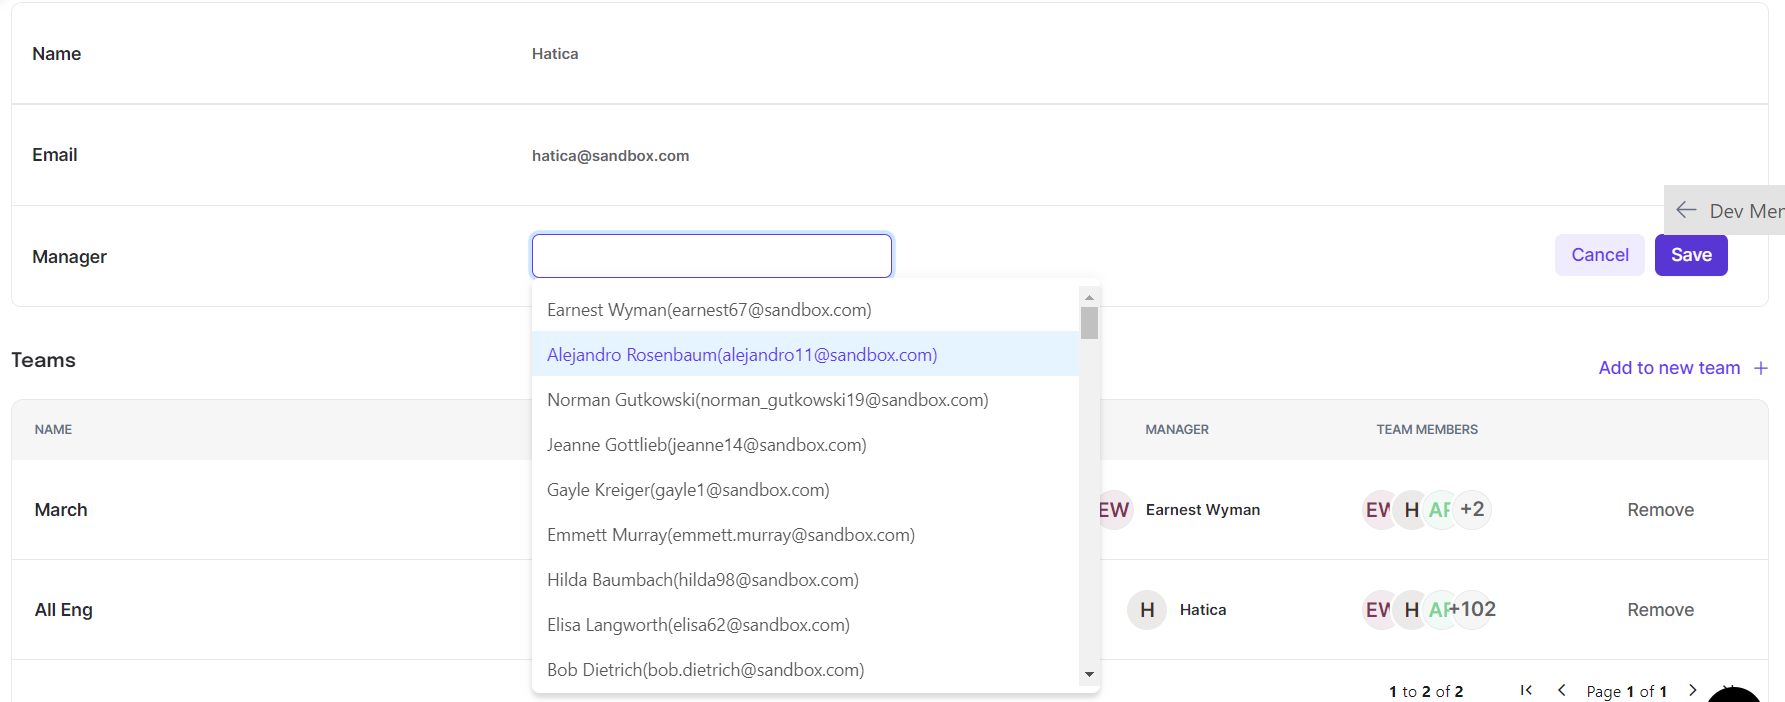
In the Manager section, you'll find an option to edit the manager details. Click on the "Edit" button.

-
-
Add the Manager's Name:
- After clicking on Edit, locate the field for entering the manager's name.
- Enter the name of the new manager.
-
Save Changes:
- Once you've added the new manager's name, review the changes to ensure accuracy.
- Click on the "Save" button and update the user's manager details.
Changing roles
Role changes in Hatica empower administrators to tailor access levels and permissions for team members. By seamlessly transitioning between roles such as Admin or Member, organizations optimize collaboration and workflow management within the platform.
-
Go to Settings and Access Members
- Go to Hatica platform settings, click on "Members"
-
Select the User to Change Role:
-
Once you're in the Members section, you'll see a list or table displaying user information, including their roles and settings.
-
Identify the user for whom you want to change the role, and click on their name or profile to access their settings.
-
-
Access and Permissions Section:
-
Within the Access and Permissions section, locate the option labeled "Account Role".
-
Click on the "Edit" button or link associated with the account role.

-
-
Choose Role from Dropdown:
- After clicking on Edit, a dropdown menu or list will appear where you can select the new role for the user.
- Choose the desired role(Admin or Member) from the dropdown menu.

-
Save Changes:
- Click on the "Save" button to confirm the changes and update the user's role.